Try the Misty API with a proxy
Summary
In this tutorial, you are shown how to instantiate a workspace with a Misty robot
(for example, fixed_misty2) to control the robot through the
Misty Command Center, to directly make
Misty REST API calls
through a secure proxy. (Note that the Misty Command Center is a product of Misty
Robotics, Inc., and NOT A PART OF rerobots.)
If you think that something is missing, or if you find errors, please contact us or open a ticket.
Searching
To begin, sign-in to https://rerobots.net, and go to the search page. It should look like the following:
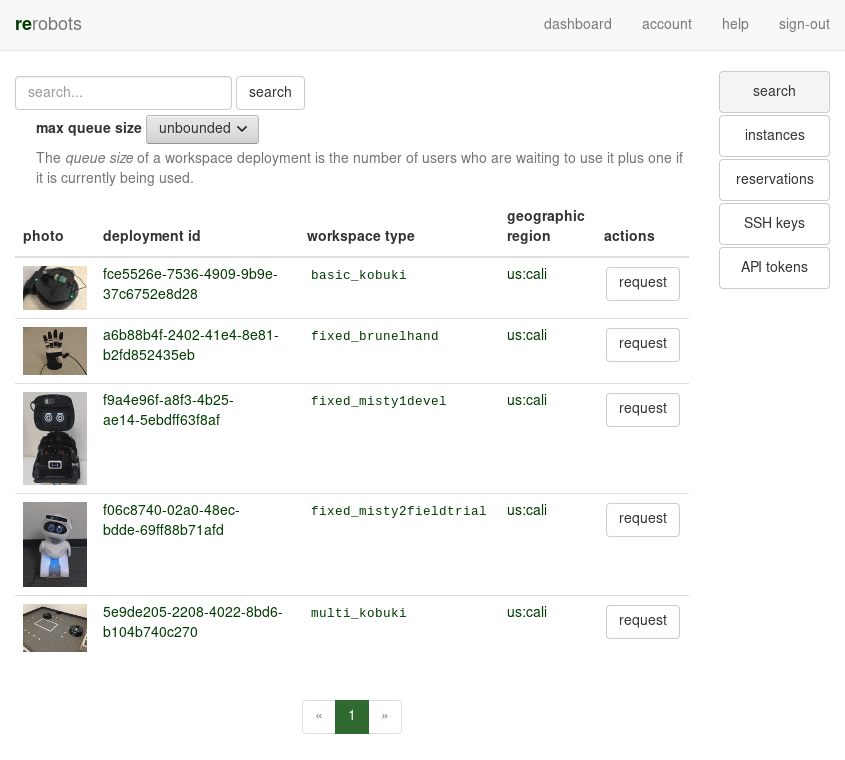
For this tutorial, we want to use a workspace deployment that has the type
fixed_misty2. If one is not
already listed, enter "misty" into the search field, or try the following URL:
https://rerobots.net/search?q=fixed_misty2
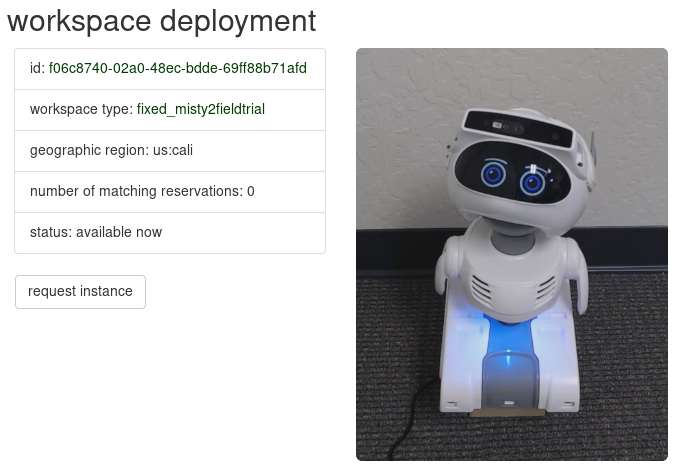
Click on the photo or the "deployment id" of one of the items in the search results. You will get a brief description of the workspace, which should look like the following:
Requesting an instance
To request to use the workspace deployment that you are viewing, click the "request instance" button. The next page provides some choices about the instance that you will create. It should look like:
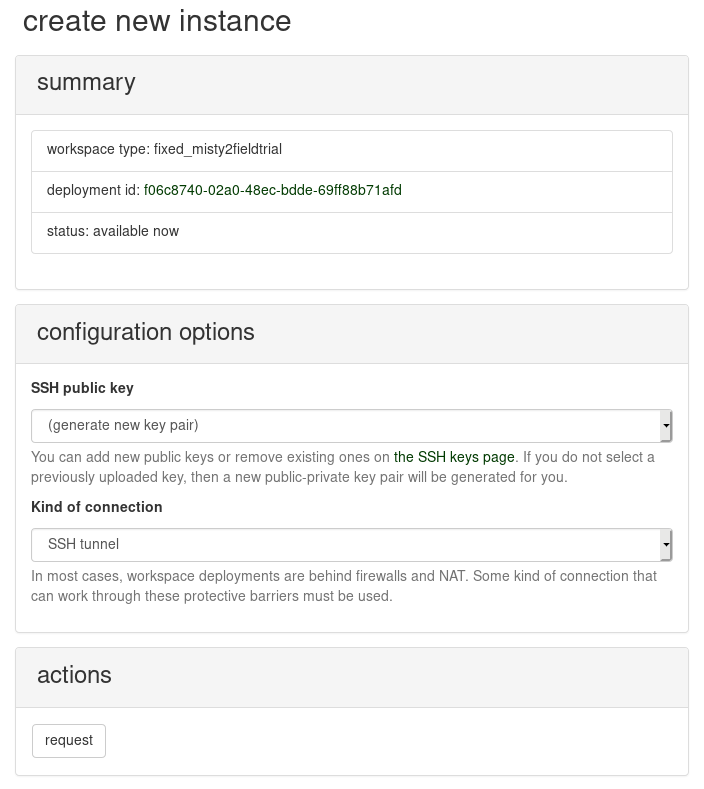
If you encounter difficulty here, please contact us.
If your request is accepted, then you will be redirected to a page that shows all of your active instances. Notice that there is a message at the top of the page:
Your new workspace instance is initializing! Because you did not use an SSH key that is already associated with your user account, a new key pair was generated for this instance. The following link can be used to download the private key precisely once.
When you are ready, select the link "Download private key.", which will download
a file named key.pem. Be careful to only click the link when you are ready for
the download. If you are not ready yet, then ignore the message. The same URL is
listed later in the "alerts" panel.
Starting the Misty proxy
Go to your rerobots instances list. There
should be a fixed_misty2 instance that you just created. After several
minutes of initializing, during which the robot and other parts of the workspace
are prepared, the instance status will be READY. Select it from the list to
get instance details, resulting in a page like the following:
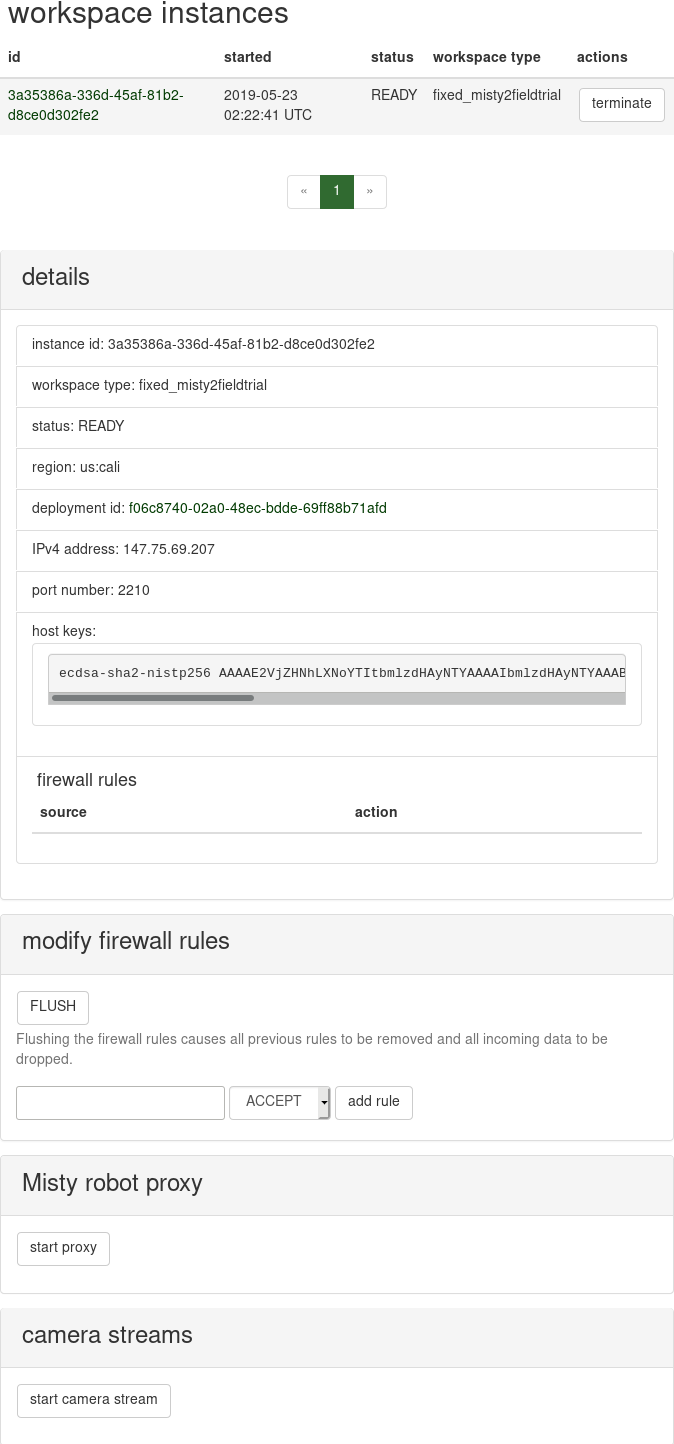
In the panel titled "Misty robot proxy", select the link "start proxy". This will start a proxy server through which you can remotely make API calls on the Misty robot.
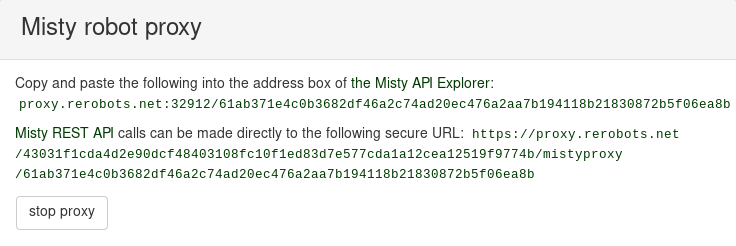
In this example, you would copy-and-paste the first address
(proxy.rerobots.net:32912/61ab371e4...) into the "Robot IP Address" box at
http://sdk.mistyrobotics.com/command-center/.
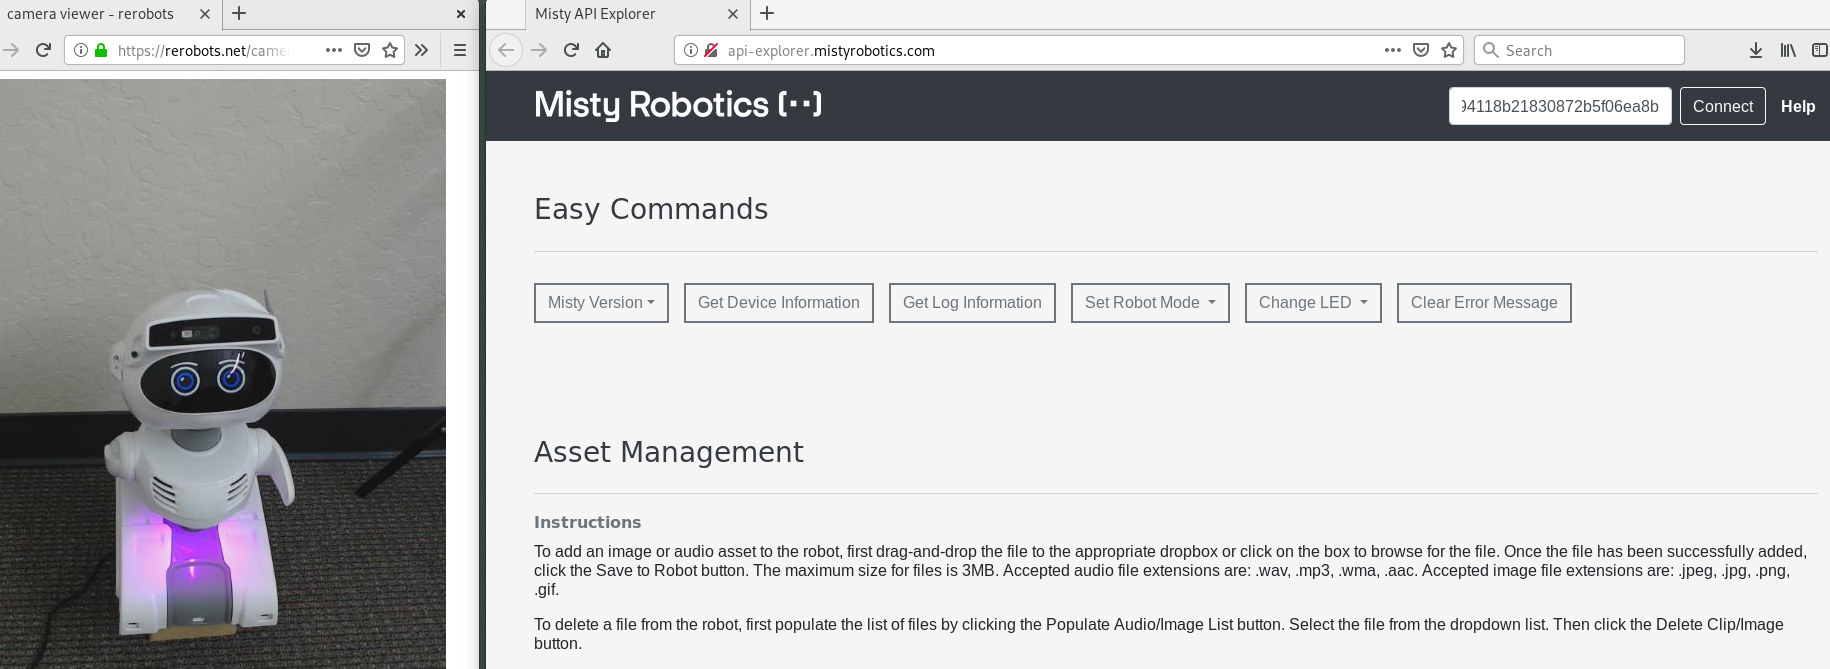
To view the robot, select the link "start camera stream" in the panel titled "camera streams". This will start the camera stream and generate a URL for viewing it.
Find the link with text "open camera stream". Open this link in a new browser
window. Try arranging the camera stream window on one side of your desktop and
the Misty Command Center window on the other side, as shown in this screenshot:
A similar arrangement is shown in the following video:
The general case
The mistyproxy add-on provides another URL prefix that has the scheme HTTPS
and provides a secure connection from your computer to the Misty robot. (The
Explorer website only accepts HTTP.) If you are developing your own code, then
you should use this one.
For example, if the URL prefix is
https://proxy.rerobots.net/2c748d9af25319fcb5ee5dea70400c9f4fbb8e71a5c2b31cde7ee85838b1db09/mistyproxy/c9ab91885e059d56263e514a6812b9d4a2e2b2ef71fdcb13651da9bc2e6064b3,
then you can make Misty API calls from the
command-line with cURL:
export MISTYPREFIX=https://proxy.rerobots.net/2c748d9af25319fcb5ee5dea70400c9f4fbb8e71a5c2b31cde7ee85838b1db09/mistyproxy/c9ab91885e059d56263e514a6812b9d4a2e2b2ef71fdcb13651da9bc2e6064b3

curl $MISTYPREFIX/api/device
which demonstrates GET /api/device. Notice
that we save the URL prefix to the shell variable $MISTYPREFIX, which makes
the curl command concise.
Conclusion
When you are done, return to https://rerobots.net/instances, find the instance
that you created in the table, and push the terminate button.