VPN-based instance with ROS and Brunel Hand
Summary
In this tutorial, you are shown how to instantiate a workspace that has a Brunel Hand and that is accessed over VPN. If you want to see an example video that you can reproduce, skip to the section Commanding motion.
If you think that something is missing, or if you find errors, please contact us or open a ticket.
Searching
To begin, sign-in to https://rerobots.net, and go to to the search page. It should look like the following:

For this tutorial, we want to use a workspace deployment that has the type
fixed_brunelhand. If one is not already listed, enter "brunel" into the search
field, or try the following URL: https://rerobots.net/search?q=fixed_brunelhand
Click on the photo or the "deployment id" of one of the items in the search results. You will get a brief description of the workspace, which should look like the following:

Requesting an instance
To request to use the workspace deployment that you are viewing, click the "request instance" button. The next page provides some choices about the instance that you will create. It should look like:
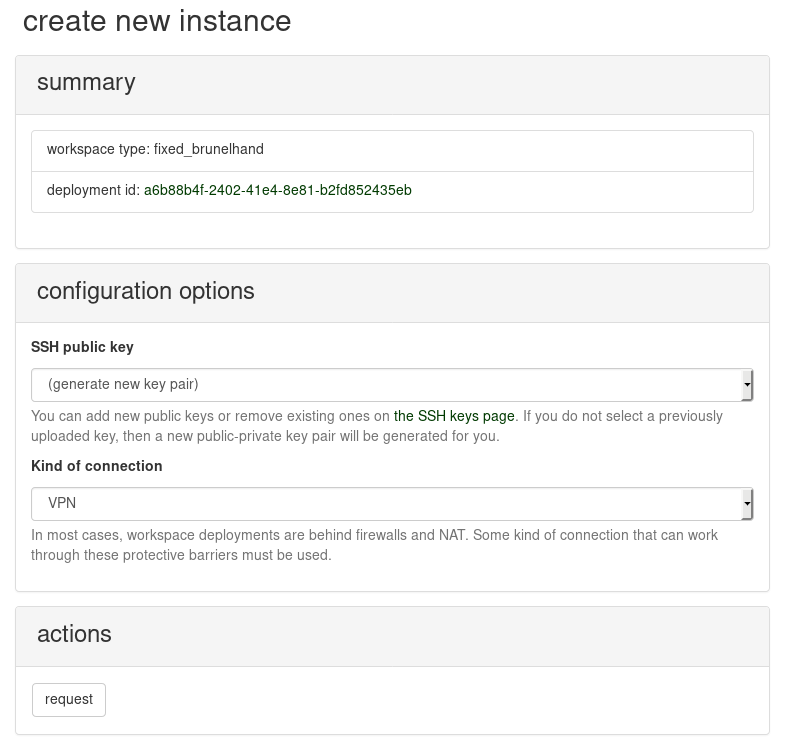
Under "kind of connection", select "VPN". Then, request it. A reservation system is under development, so your request might be denied if someone else started to use the same workspace. If you encounter difficulty here, please contact us.
If your request is accepted, then you will be redirected to a page that shows all of your active instances. Notice that there is a message at the top of the page:
Your new workspace instance is initializing! Because you did not use an SSH key that is already associated with your user account, a new key pair was generated for this instance. The following link can be used to download the private key precisely once.
When you are ready, select the link "Download private key.", which will download
a file named key.pem. Be careful to only click the link when you are ready for
the download.
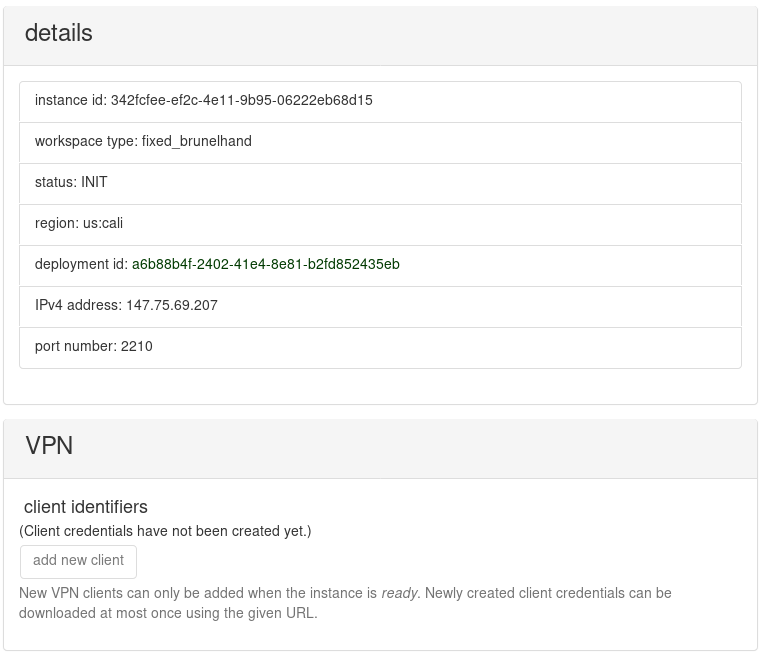
In the table of your instances, you will find the one that you just created. Its
status should be INIT, which indicates that it is initializing. If you select
it, then details will be shown that look like the following:
Creating a new VPN server for your instance can require up to 12 minutes, more
or less, because the certificate and key generation process is slow. Thus,
consider taking a break for 10 minutes before clicking the refresh
button. Eventually, the outcome should be READY or INIT_FAIL. If you get
INIT_FAIL, then something broke during initialization. In this case, you can
terminate the instance and repeat early steps of this tutorial, or contact
us for help. Thanks for your patience as we try
to make the rerobots service more robust.
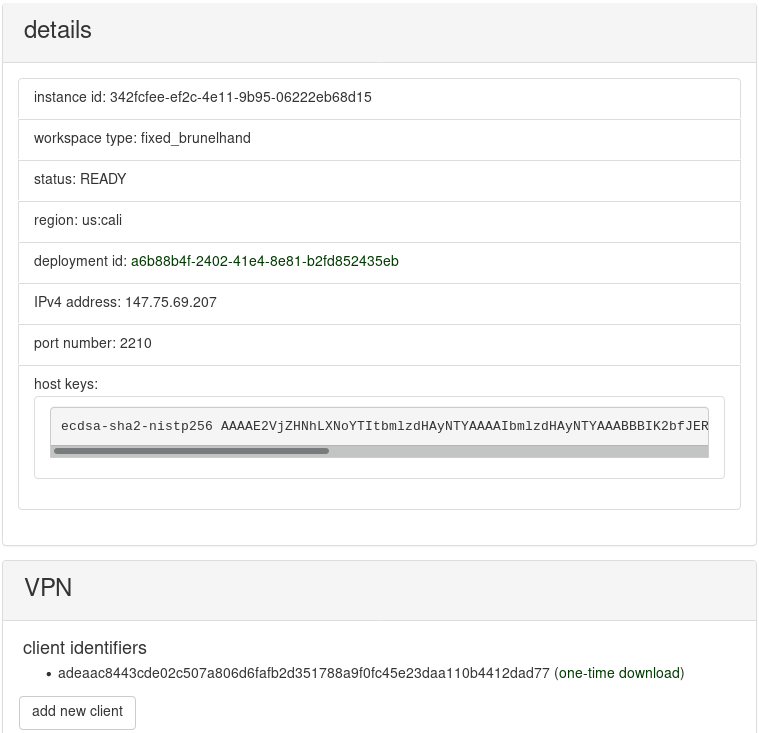
If you get READY, then the workspace instance is ready for you!
Your first log-in
Now that the workspace instance has the status of READY, find the section
"VPN" on the page and click the "add new client" button. The response might be
slow (approx. 10 seconds). When completed, there will be a new entry in the list
of "client identifiers" with a "one-time download" link. Like the URL for your
SSH key, this can be used precisely once. When ready, select "one-time download"
to get an OVPN file. If something goes wrong, then try "add new client"
again. (You can generate VPN credentials for as many clients as you want.)
Import the OVPN file into your VPN client software. It contains client
credentials with which you can connect to the VPN of your instance, namely, a CA
certificate, a user certificate, and a user private key, along with VPN server
details. The details depend on your computer. If you have Mac OS, try
Tunnelblick. If you have
Fedora or Ubuntu, then your
network control panel should have an option to connect to a VPN. Besides these
graphical tools, you can use the openvpn
command-line program. On Linux, the command would be like: openvpn
client.ovpn.
In many cases, the default configuration is to route all network traffic through the VPN of your instance. If you only want to route packets through it that involve VPN-specific hosts, then you might need to take some additional action that depends on your client software. For example, in the GNOME network configuration tool on Fedora, there is tab for "IPv4" in the "Add VPN" dialog, where you can check a box next to "Use this connection only for resources on its network".
When connected to the VPN, open a terminal, and try
ping rrc.local
Possibly after some delay, you should get successful pings. rrc.local is the
one and only Linux host that is part of your instance of the fixed_brunelhand
workspace type.
Recall earlier in the tutorial that you downloaded key.pem, which you must use to connect via SSH. As a security precaution, permissions on the file must prevent other users from reading it. Assuming that you moved key.pem into the directory where you have a terminal, try
chmod 600 key.pem
Now, start a SSH session using this key,
ssh -i key.pem root@rrc.local
Note that in your instance, you have the root account. There is no need to use
sudo, so be careful. (You can create a new user account if you want.)
Installing the Brunel Hand CLI tool
Now we can install a small command-line program for the Brunel hand. To do so, enter the following to get necessary packages:
apt-get update
apt-get -y install python3 python3-virtualenv
python3 -m virtualenv -p python3 PY
source PY/bin/activate
pip install bhand
At the end of the above sequence, your instance will have installed the bhand
tool, which we will use to command motions. Check that it is installed and that
the Brunel Hand hardware is operational:
bhand
The output should be similar to the following:
Printing diagnostics. (Try `-h` for help.)

#
 System Diagnostics
____________________________

FW: Beetroot V1.01
Board:  Chestnut
Hand:   Right
OnTime: 00:00:01:77
CPU Temp:   26.61'C
IMU Temp:   29.31'C
Errors: No Errors
Mode:   None
Motors: DISABLED
ROS streaming of webcams
To visualize the space, we will start ROS nodes that stream images from the webcams. The instance already has the "desktop" installation of ROS Kinetic, but for this tutorial, the following packages must also be installed: cv_camera and web_video_server. To do so,
apt-get -y install ros-kinetic-cv-camera ros-kinetic-web-video-server
In this tutorial, the declaration of ROS nodes is through a roslaunch file. Create a text file on your computer called demo.launch and place the following in it:
<launch>
  <node name="video0" pkg="cv_camera" type="cv_camera_node">
<param name="device_id" value="0" />
  </node>
  <node name="video1" pkg="cv_camera" type="cv_camera_node">
<param name="device_id" value="1" />
  </node>
  <node name="webstreamer" pkg="web_video_server" type="web_video_server">
<param name="address" value="0.0.0.0" />
<param name="port" value="8080" />
<param name="ros_threads" value="2" />
  </node>
</launch>
Save it, and copy it into the instance host:
scp -i key.pem demo.launch root@rrc.local:/root/
Start an SSH session with rrc.local again, and enter
roslaunch demo.launch
Then, direct your Web browser at http://rrc.local:8080. The video streams
listed are coming from the web_video_server ROS node.
Commanding motion
Start another SSH session (something like ssh -i key.pem [email protected]) and
source PY/bin/activate
bhand --raw A3
which should end with a confirmation like
Motors ENABLED
You can now send motion commands. For example,
bhand --raw G0
will cause a fist to form. Send the same command again to toggle between "open" and "close":
bhand --raw G0
bhand --raw G0
and watch the video stream in your Web browser. Depending on the speed of your Internet connection, there might be some delay in the video. If the video has extreme lag, hit the refresh button.
A brief help message for the CLI program bhand can be obtained by
bhand --help
and to get a help message from the firmware, try
bhand --fw-help
or, equivalently, bhand --raw \?. Technical specifications are available from
the Brunel Hand product page by
Open Bionics.
Conclusion
When you are done, return to https://rerobots.net/instances, find the instance
that you created in the table, and push the terminate button.